The Leica Emspira 3 and YOU
The Leica Emspira 3 microscope is a digital microscope that allows detailed observation of samples.
The Leica Emspira 3 has no eyepiece; instead, the visual image is displayed on a nearby screen.
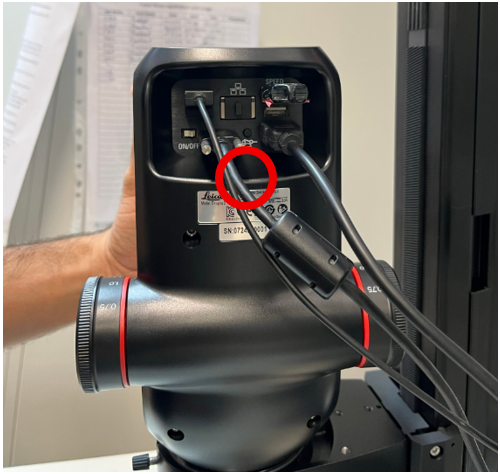
The Leica Emspira 3 microscope is not connected to a computer (only to a screen). Therefore, to save and collect images, a USB drive is required.
Make sure a USB drive is connected to the USB SPEED port at the back of the microscope before starting work.
The microscope software can be installed on any PC and can be downloaded from the Mass Lab drive.
Step One – Switch On
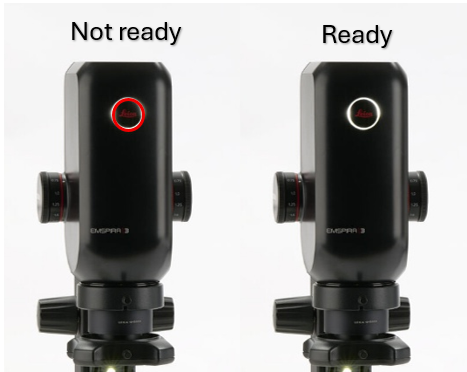
Press the ON/OFF button at the back of the microscope.
Wait for the LED to turn white (ready) and for the live image to appear on the monitor.
Step Two – Preparing Your Sample
To protect the microscope, samples should be placed on a Petri plate.
Make sure the sample lies flat and horizontal on the plate.
Step Three – Adjusting to Your Preferences
Focus
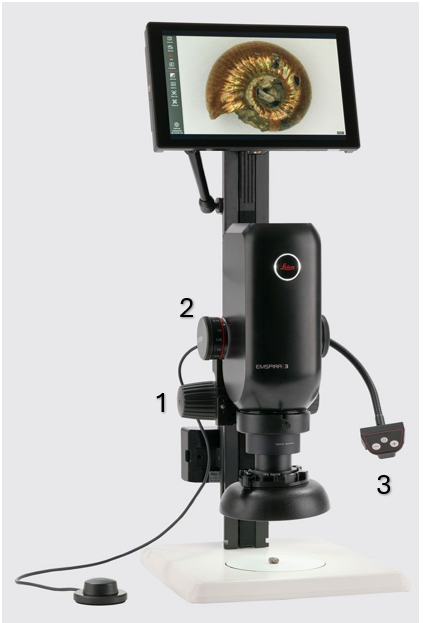
Use the focus knobs to bring the sample into sharp view.
Zoom
Rotate the zoom knob to change magnification.
Click-stop mode:
Push the slider toward the knob to enable fixed zoom steps (recommended for measurements).
Illumination
Press the light button to turn on the LEDs and adjust brightness using the + / – buttons.
This is a segmented light system, allowing:
- Partial LED illumination
- Side or diagonal illumination
To switch between illumination modes:
- Press the middle button
- Use the arrow buttons to change light direction
Capture Images
- Insert a USB stick into the USB SPEED port
- Use the on-screen display (OSD) or the optional footswitch to capture images
- Images are saved in JPG / TIF / BMP formats
- Images can be accessed via the gallery icon
Additional options
- White balance: use a white sheet of paper for calibration
- Compare mode: right-click an image in the gallery and choose Compare to view it next to the live image
- Camera settings: use the – / + button to switch between automatic and manual modes
- Measurement: measurements can be performed on a live image only (freeze mode available)
Step Four – End of Work
- Turn off the camera and illumination
- Cover the microscope when not in use
- Clean lenses using a lens cloth and ethanol only
- Never use harsh chemicals
- Do not disassemble microscope parts
Written on 11/12/2025 by Almog Ben-Natan